Comment Faire Table Des Matieres Page De Garde Et Titres
Okay, so picture this: I'm hunched over my laptop at 3 AM, fueled by lukewarm coffee and the sheer terror of a looming deadline. I'm wrestling with a report that's longer than a Tolstoy novel (okay, maybe not quite that long, but it felt like it!), and the worst part? I had to create a table of contents... from scratch. Let's just say my sanity was hanging by a thread. Sound familiar?
We've all been there, haven't we? Staring blankly at a blinking cursor, wondering how to magically conjure up a table of contents that doesn't look like it was cobbled together by a caffeinated squirrel. But fear not, mes amis! Today, we're tackling this beast head-on. We're going to learn how to create a table of contents, add it to the page de garde (cover page), and properly format those pesky titles. No more late-night panic attacks, I promise!
The Majestic Table of Contents: A Necessary Evil?
Let's be honest, a table of contents might seem like a purely administrative burden. Like, really, who actually uses them? Well, besides your professor or boss (who, let's face it, will use it), a well-crafted table of contents is your secret weapon for organization and clarity. It's like a roadmap to your document, guiding the reader through your brilliant ideas (or at least, what you hope are brilliant ideas).
Must Read
Think of it this way: if your document is a sprawling forest, the table of contents is the clearly marked trail. It prevents people from getting lost in your writing jungle. Plus, it makes you look like you know what you're doing. And who doesn't want to look like a pro?
Page de Garde Power: The First Impression Matters
Now, about that page de garde. Also known as the cover page. This is your chance to make a killer first impression. Keep it clean, professional, and visually appealing. Less is often more. Resist the urge to cram every single detail onto it. Your title, your name, the date, maybe your institution logo – that's usually enough.
And here's the crucial part: while the table of contents can technically live on the cover page (especially for shorter documents), it's generally better to keep it on a separate page after the cover page. This allows your cover page to shine and avoid becoming visually cluttered. Your call, though – you’re the boss here!
Titles that Pop: Structuring Your Document Like a Boss
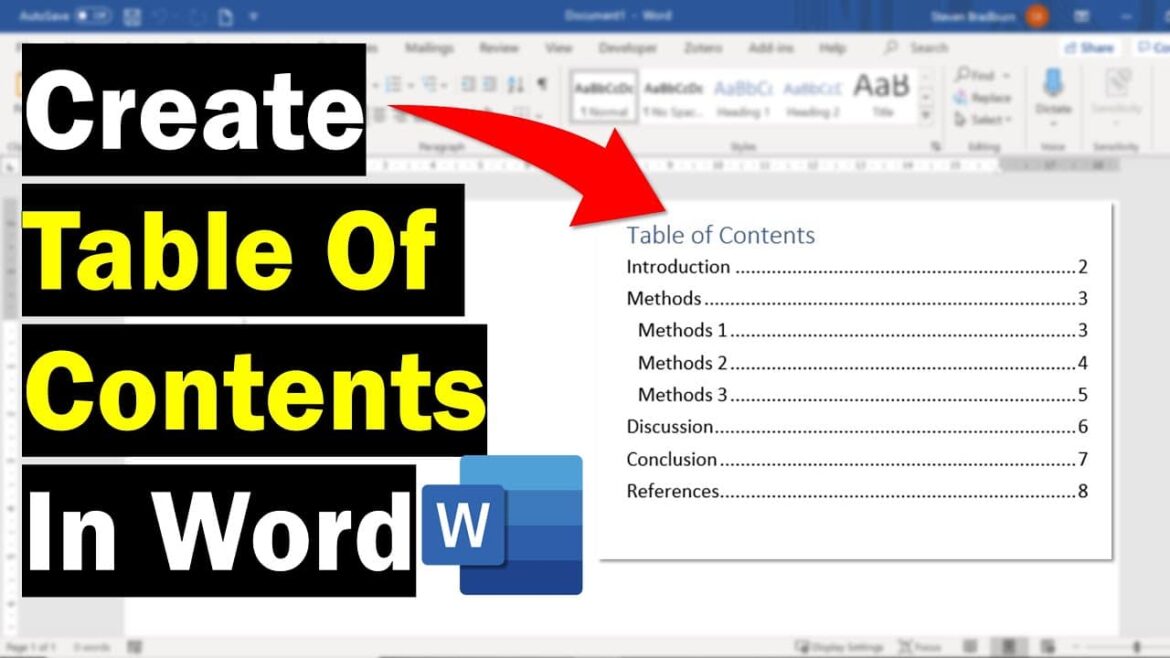
Okay, so how do we actually get a table of contents? The secret lies in properly formatting your titles! Word processing programs (like Word, Google Docs, LibreOffice) use heading styles (Heading 1, Heading 2, etc.) to automatically generate a table of contents. This is crucial. Don't just make your titles bigger and bolder. Use the actual heading styles! I can't stress this enough!

Heading 1 is usually reserved for your main title, Heading 2 for your major sections, Heading 3 for subsections, and so on. Think of it as a hierarchical structure. Your table of contents will automatically reflect this structure, creating a nicely indented outline. C'est magnifique!
Here's the magic formula:
1. Style your titles using the heading styles.
2. Insert a table of contents (usually under the "References" or "Insert" tab).
3. Voila! A table of contents appears, magically populated with your titles and page numbers.

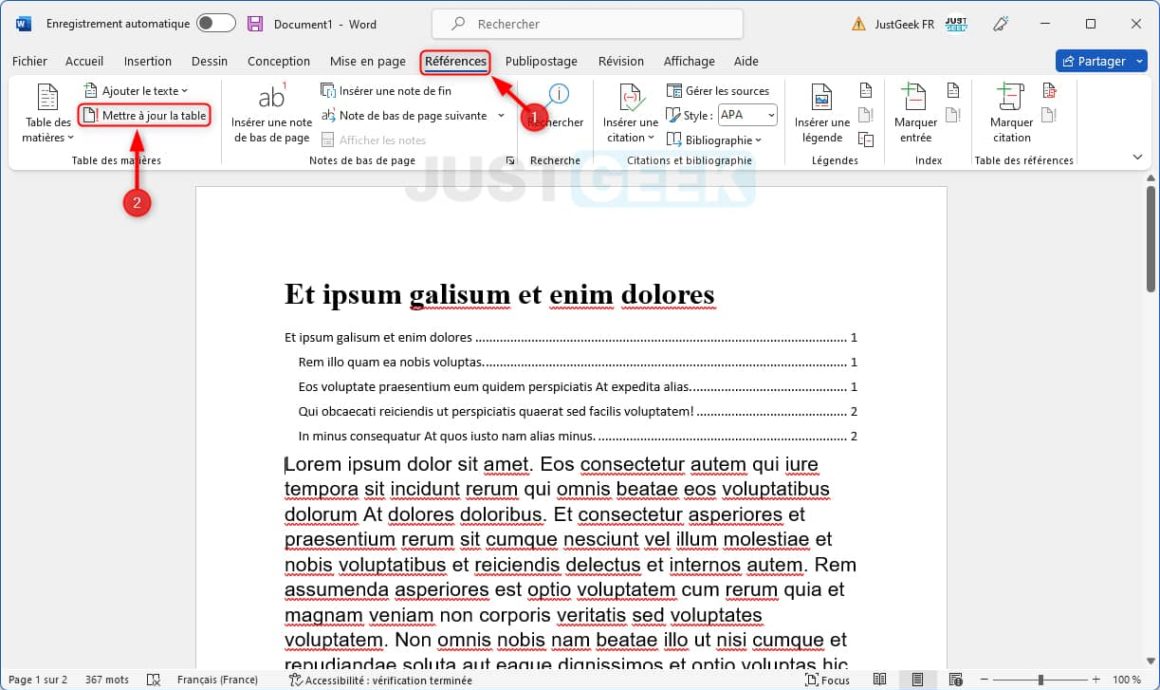
Pro Tip: If you make changes to your document, don't forget to update your table of contents! Right-click on it and select "Update Field" or "Update Table." Otherwise, your page numbers will be all wrong, and that’s just embarrassing.
So there you have it! Creating a table of contents, managing your page de garde, and styling your titles doesn't have to be a nightmare. With a little bit of planning and the magic of heading styles, you can create documents that are both professional and easy to navigate. Now go forth and conquer those reports! And maybe grab another coffee – you've earned it!
![Table des matières : numéro de page [Résolu] - Word](https://img-19.ccm2.net/I90GwsvcJfshRcnjUk_ukWwwRmg=/9844b157f26f45c48f324ad72df4b478/ccm-ugc/Table_des_matieres.png)


