How Do I Cancel Subscriptions On Iphone
Okay, so picture this: me, late at night, scrolling through my bank statement. I see a charge for... "Super Awesome App Pro Max Extra Gold Edition"? Wait, what? Turns out, I'd signed up for a free trial months ago (they always get you that way, don't they?) and completely forgotten about it. Suddenly, I was paying for premium cat filters. Cat filters I never used. The horror! That's when I realized I needed to get my subscription game under control. And hey, maybe you’re in a similar boat? (Please tell me I'm not the only one!)
So, how do you ditch those sneaky subscriptions lurking on your iPhone? Don’t worry, it’s actually pretty straightforward. Even I, a self-confessed tech klutz, managed to figure it out.
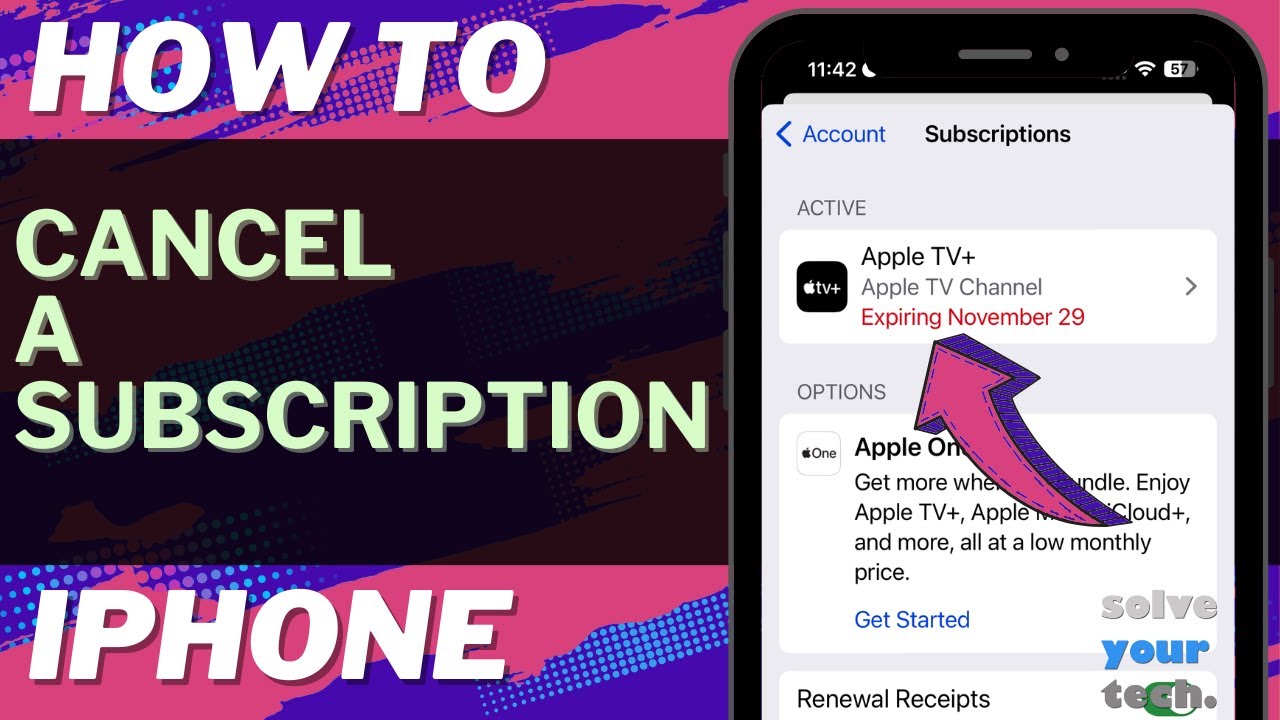
The Subscription Safari: Where to Find Them
First things first, you need to find the hidden lair of your active subscriptions. There are a couple of ways to do this, but I find the simplest is through the App Store. Because, you know, everything app-related lives there. Logic!
Must Read
Here's the drill:
- Open the App Store. You know, the blue one with the "A."
- Tap your profile icon. It's usually in the top right corner. Unless you've accidentally changed your settings (we’ve all been there), it'll have your picture or initials.
- Tap on your name/Apple ID at the top. You might need to enter your password or use Face ID. Security first!
- Look for "Subscriptions". See it? Click it!
Ta-da! You’ve arrived! This is where all your active and expired subscriptions reside. Prepare yourself… the truth may be shocking.

Operation: Cancel Everything (Or At Least Some Things)
Now that you're staring at the list of your commitments (financial and otherwise), it's time to decide what to prune. Be ruthless! Do you really need that cloud storage for all those photos of your cat (no offense, cat lovers)?
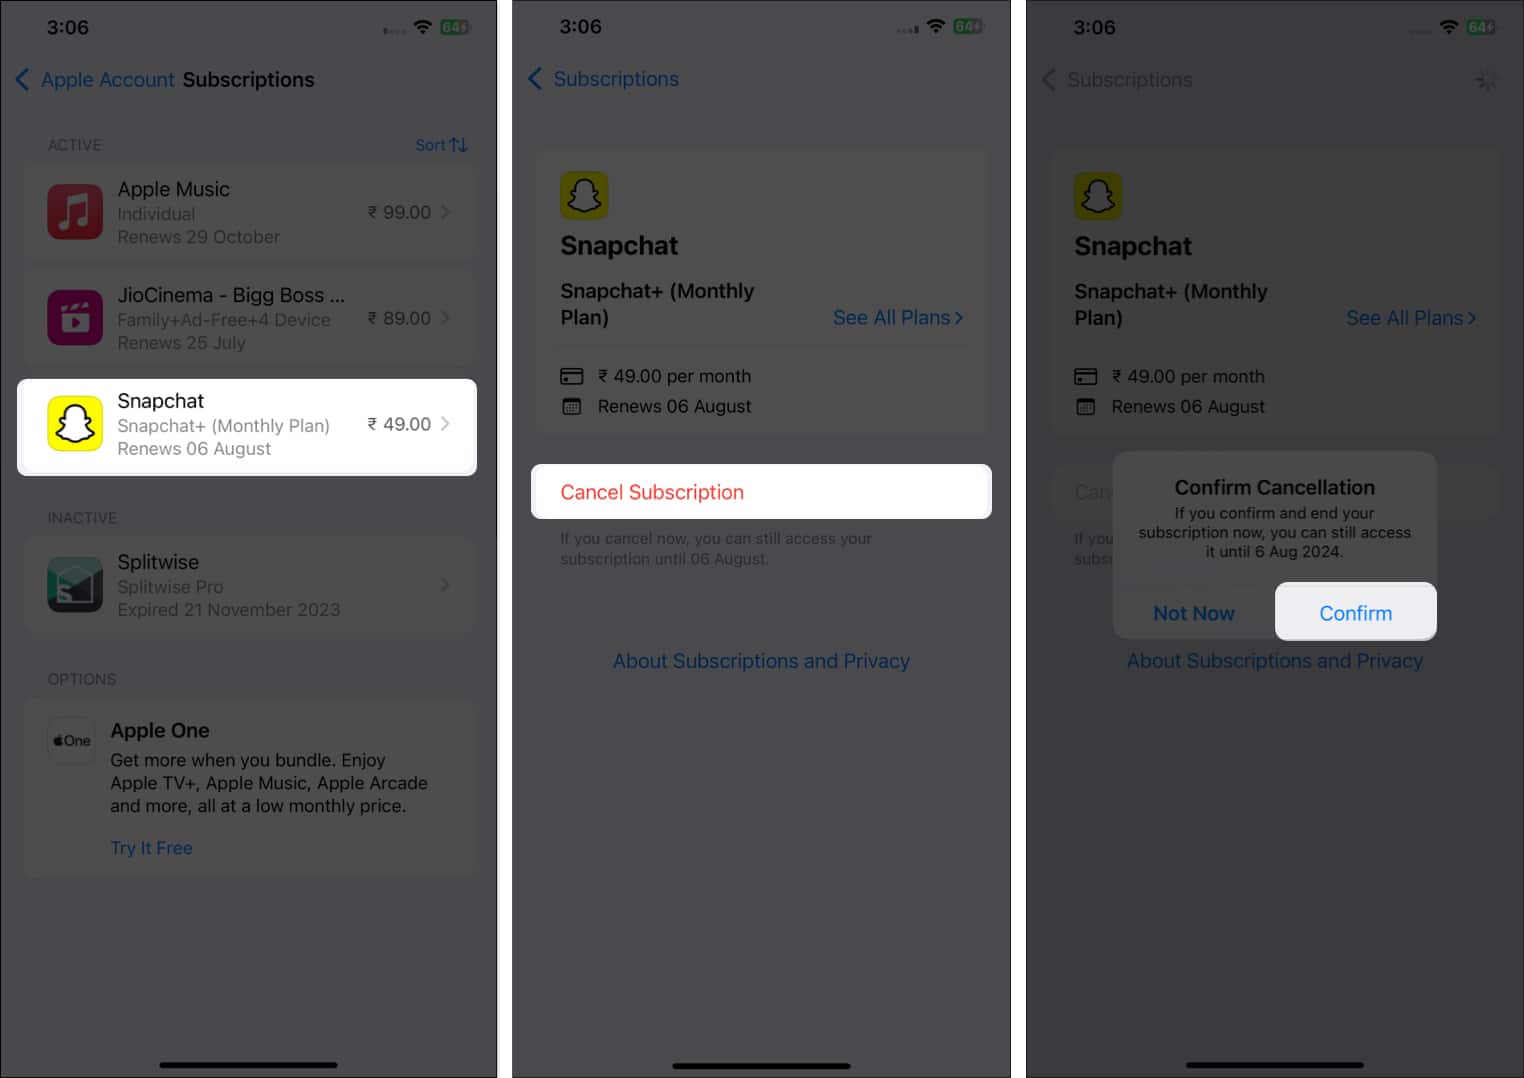
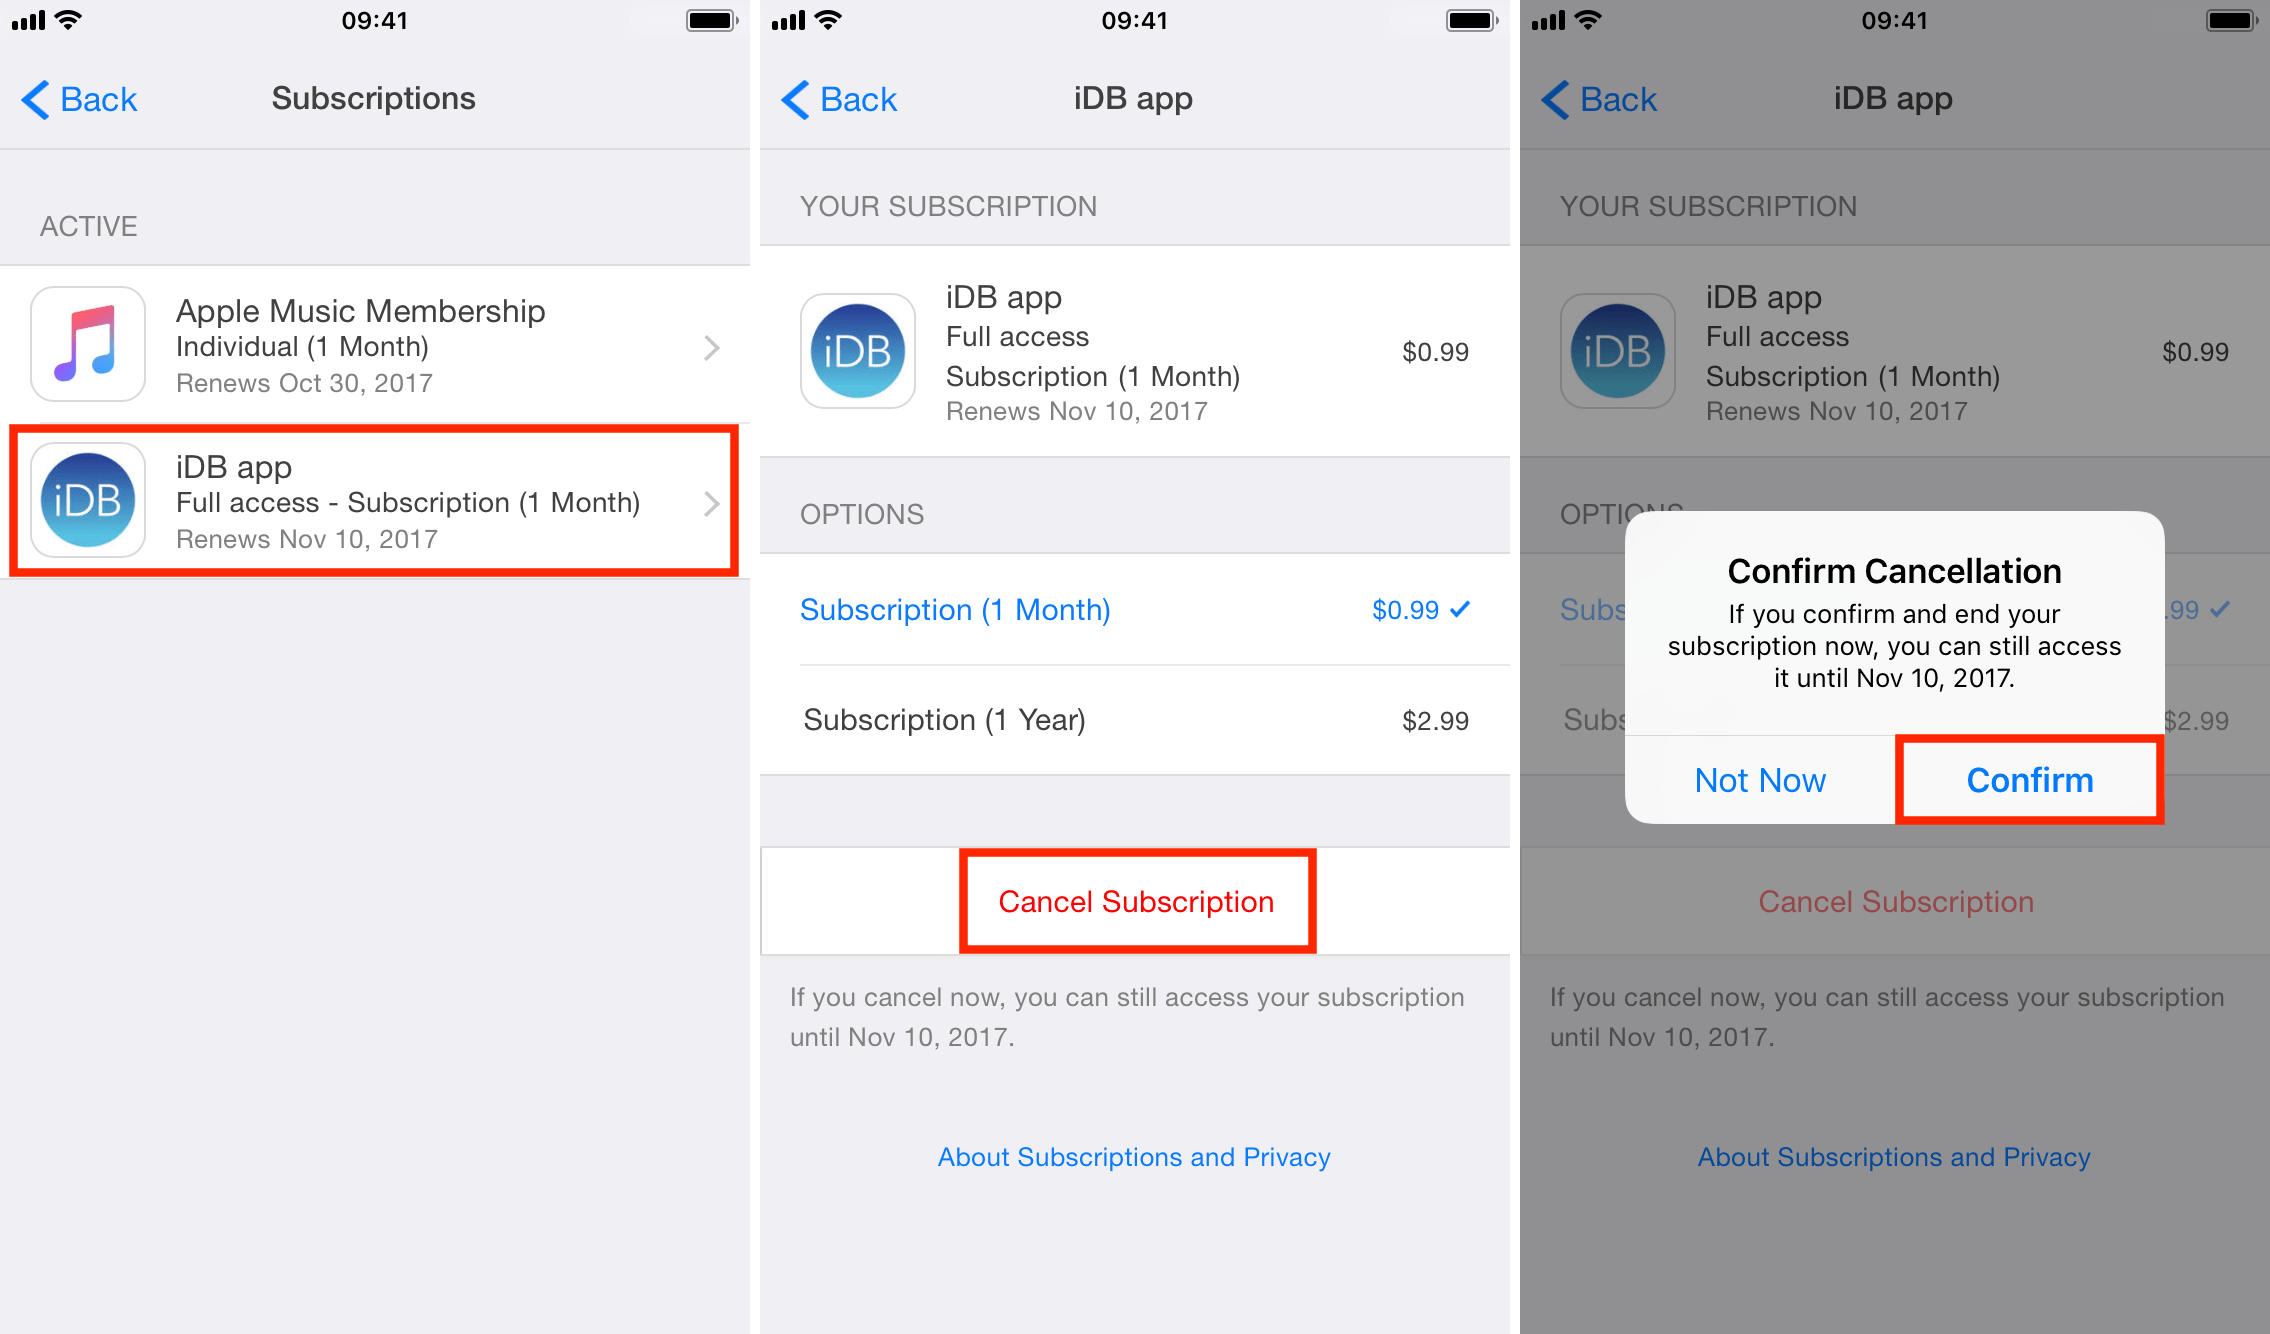
To cancel a subscription:

- Tap on the subscription you want to get rid of.
- Scroll down (and down… some apps like to make this harder than it needs to be) until you find the "Cancel Subscription" button. It might also say "Cancel Free Trial."
- Tap it! Seriously, tap it!
- You might be asked to confirm. Confirm! Confirm with extreme prejudice!
Important Note: Cancelling a subscription usually means it won't renew at the end of the current billing cycle. You'll still have access until then, so don't panic if your premium cat filters are still working for the next few weeks.
Also Important: Check the cancellation policy! Some subscriptions might have penalties for early termination. Read the fine print (I know, nobody likes to, but trust me on this one).
:max_bytes(150000):strip_icc()/canel-itunes-subscription-iphone-2-93d28c2507b9475686f30fd3ea7c6bfc.jpg)
Alternative Route: Through Settings
If you're feeling adventurous (or can't find the "Subscriptions" section in the App Store – it happens!), you can also manage your subscriptions through your iPhone's Settings.
- Open Settings. The gray gear icon.
- Tap on your name at the top. The one connected to your Apple ID.
- Tap on "Subscriptions". (Hopefully, it's there this time!)
- Follow the same steps as above to cancel.
Staying Vigilant: Preventing Future Subscription Disasters
Okay, you’ve canceled your unwanted subscriptions. Congrats! But how do you avoid repeating this saga in the future? Here are a few tips:
- Be wary of free trials. They're like those cute kittens – irresistible at first, but potentially expensive later. Set a reminder to cancel before the trial ends.
- Review your subscriptions regularly. Set a recurring calendar reminder to check your subscriptions every month or quarter. Pretend it's a fun game of "Spot the Unexpected Charge!" (Okay, maybe not fun, but necessary.)
- Read the fine print. Yes, I know, I know. But seriously, understand the terms of service before signing up for anything.
So, there you have it. A guide to conquering the subscription monster on your iPhone. Now go forth and reclaim your money! And maybe avoid those cat filter apps in the future… just a suggestion. 😉