Insérer D'autre Page De Garde Microsoft

Okay, picture this: It's 3 AM. You're fueled by coffee and sheer willpower. Your thesis is due in, like, six hours. You finally finish writing, only to realize… your cover page is the default, super boring, Microsoft Word one. Cue dramatic music. Sound familiar? We've all been there.
Well, the good news is, you don’t have to be stuck with that same old tired page. Did you know you can actually insert different cover pages in Microsoft Word? Yep, mind blown, right?
Why Bother with a Fancy Cover Page Anyway?
Let’s be honest, a cover page is like the outfit your document wears to a fancy party. It’s the first impression. A good one makes you look polished and professional. A bad one… well, it screams "I waited until the last minute!".
Must Read
But beyond aesthetics, a well-designed cover page clearly presents crucial information: title, author, date, institution… you know, the important stuff. Think of it as a mini-summary.
(Side note: ever noticed how some companies use super sleek, branded cover pages? That's no accident!)

So, How Do We Insert These Magical Cover Pages?
Alright, enough chit-chat. Let's get down to business. It’s surprisingly easy, I promise!
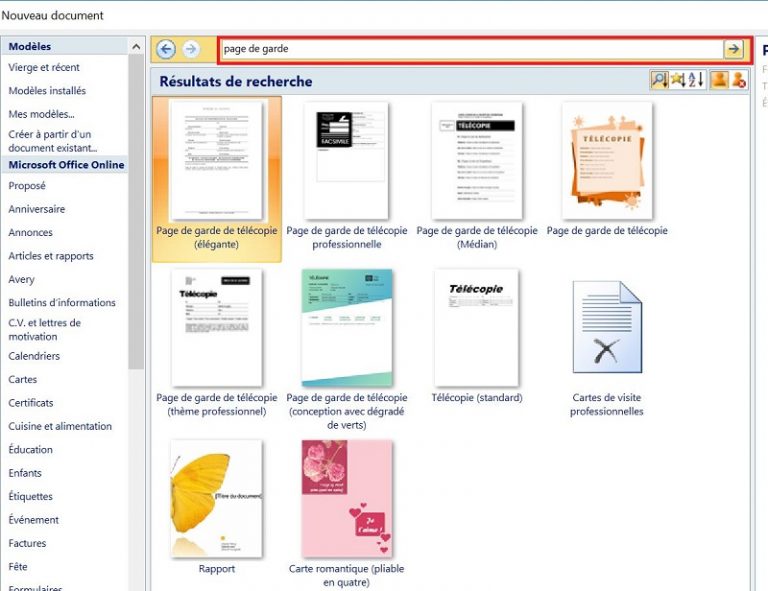
First, open your Microsoft Word document. Now, go to the “Insertion” tab. You’ll see a “Pages” group. Click on the “Page de garde” (Cover Page) option. Voilà! A dropdown menu of pre-designed cover pages appears.
Take a look at the options. Word offers a surprisingly diverse selection. Got a report that needs a serious, corporate vibe? There's a cover page for that. Writing a whimsical children's story? There's probably one for that too (or you can get creative later - more on that below!).

Once you find one you like, simply click on it. Boom. Your selected cover page appears at the beginning of your document. Now you just need to fill in the required information – title, author, date, etc.
Customization is Key!
Okay, let's say you like the general layout of a cover page, but you want to tweak it a little. Good news! You can absolutely customize these pre-designed templates.
Simply click on the elements you want to change. You can edit the text, font, colors, and even add your own images or logos. Don’t be afraid to experiment! Remember to stick to consistent formatting! (Trust me, it looks better!).
And if you're feeling really adventurous, you can even design your own cover page from scratch! Just insert shapes, text boxes, and images to create a truly unique design. It might take a little more time, but the results can be amazing!
(Pro tip: Use high-resolution images for the best results. Blurry logos are never a good look.)
Deleting a Cover Page (Just in Case...)
Okay, so maybe you added a cover page and decided it wasn’t right for you. Don’t panic! It’s easy to get rid of it.

Go back to the “Insertion” tab, click on “Page de garde”, and then select "Supprimer la page de garde actuelle" (Remove Current Cover Page). And poof, it’s gone.
In Conclusion…
Adding or changing a cover page in Microsoft Word is a simple way to make your documents look more professional and polished. So, ditch the default and get creative! Your readers (and your professors) will thank you for it.
Now, go forth and conquer those cover pages! You got this!


